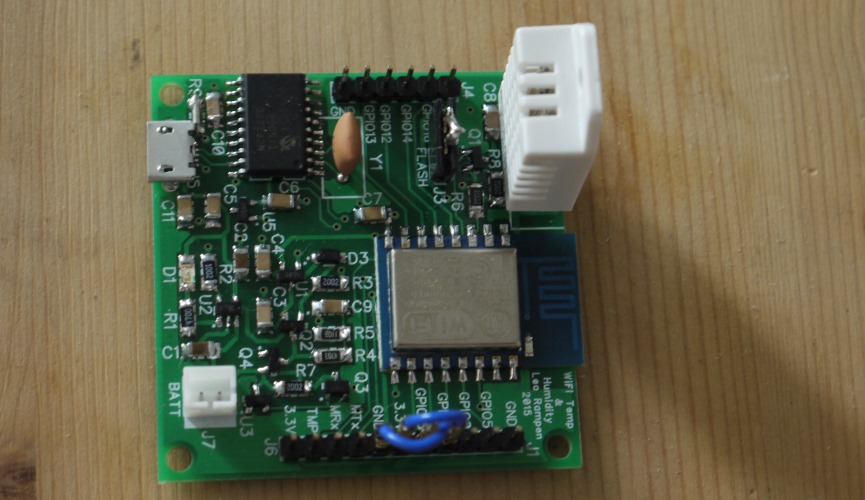
WiFi Temperature Sensor Board

Sometimes I wake up feeling completely refreshed, other times I wake up incredibly thirsty. I was curious to see what effect the temperature and humidity had on how I felt in the morning.
I’m sure there’s off the shelf components which would tell me that. That’s no fun though! The ESP8266 is a dirt cheap WiFi module incorporating a CPU and a bit of IO. I decided to design a small battery powered board around it to answer my question by logging temperature and humidity to a server. This would also prove to be a nice way to understand the process of ordering a low cost PCB from China.
I decided to use the ESP-12 WiFi module. It has more IO than the smallest ESP-01 module, and claims to be FCC certified. I’m not sure if it is, but it does come with shielding over the SoC. I chose to leave connections for the ESP-01 module as well, making the PCBs I designed multi-purpose. I used a very cheap DHT22 (also known as AM2302) temperature and humidity sensor (relatively high precision but I doubt that it’s very well calibrated). I also wanted to play with designing a battery charging circuit for small LiPo batteries, and incorporated a USB to UART IC to communicate with the SoC (for both programming and configuring the WiFi hotspot).
I captured the schematic using DipTrace. It’s a fairly fully featured EDA suite which is low cost (small designs are free) and has a nice user interface and an active community.
Schematic
 Click here for the full PDF schematic.
Board Layout
I designed the PCB mostly using 1206 SMD passives. In retrospect these were probably too big - I could have easily soldered 0805s. I wanted to keep it under 5cm x 5cm to stay in the cheapest price bracket at SeeedStudio.
The PCB in DipTrace without the top layer copper pour
 The PCB as made
Ordering
Ordering from Seeedstudio isn’t particularly hard. You first need to export Gerbers from your EDA software. DipTrace has a nice dialog which lets you do it, albeit quite slowly. Each file must have a name as given by SeeedStudio. Once you’ve uploaded the files SeeedStudio provides an online Gerber viewer to let you see your PCB.
Send it away, and then 2 weeks later a package arrived!

Building
I ordered all my components from Farnell. Prices aren’t the best, but you’re sure to get genuine components and their shipping speed is amazing.
I hand soldered it - a slow and methodical process. It probably took about 3 hours. The trickiest parts were the tiny SOT-23 MOSFETs and voltage regulators. If I did this again I’d probably use smaller passives, perhaps 0805 (the 1206 ones I used dwarfed some of the ICs).
 Populating the board
 All the SMD parts populated!
 All done. The blue jumper wires are needed to write the bootloader
The software isn’t finished yet - stay tuned!